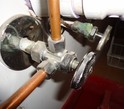
If you don't have a plunger, a few simple home objects may occasionally be used for drain cleaning and for things to be in operating order again.
How to Clear a Clogged Toilet Without a PlungerThe most straightforward technique to deal with a blocked toilet is to use a plunger, but in some instances, you may need access to one. If your bathroom is blocked and you don't have a plunger, don't worry. There are many methods for cleaning the toilet, some of which employ basic home materials that you most likely already have. If the blockage is stubborn, you may need a drain snake to clear it. Nonetheless, these home treatments will assist in removing some of the more minor blockages you'll likely face. Dish SoapPlunging a blocked toilet is unpleasant, but there is an alternative. To unclog a toilet without a plunger, go to the kitchen and get dish soap. The slippery soap may assist in lubricating the blocked pipe and make it easier for the trapped material to glide down. Fill the toilet with roughly a half-cup of bleach. If you're short of dish soap, cut up a bar of hand soap and put the pieces into the bathroom. Add Hot WaterIf dish soap alone does not accomplish the work, adding water may help. Pour a bucket halfway with the hot bath water (boiling water might fracture a porcelain toilet) and pour it from the waist level into the bathroom. The power of the water may be enough to remove the source of the obstruction. DIY Wire Hanger Drain SnakeA more severe obstruction may need physically relocating the object. Unwrap a wire coat hanger until it's straight to accomplish this without a plunger. Insert one end of the wire through the congested region. Prod the debris until it breaks away and falls down the drain. A drain auger is preferable, although a wire hanger can do in a pinch. Baking Soda MixtureUse this all-natural remedy instead of dish soap when you don't have a plunger. Fill the toilet with one cup of baking soda and two cups of vinegar. Let it bubble for 30 minutes. If the blockage persists, try the hot water approach. Make Water Pressure with a Plastic BottleThis unclogging technique has the potential to be messy. Begin by emptying as much water as possible from the toilet bowl; you may accomplish this by continually filling a small container with toilet water and putting it into a bucket. Fill a big plastic bottle halfway with warm water. Insert the bottle's top end into the toilet's bottom exit. With your thumb over the top of the bottle. (You should put on rubber gloves for this step.) Squeeze the bottle with your thumb, so the water inside shoots down the pipe. The increased pressure may be enough to remove whatever was creating the obstruction.
0 Comments
After replacing the water heater, having cold water is not pleasant. You will eventually need to replace your water heater because it is utilized more frequently than the majority of your appliances. You should prepare to replace your water heater every 10 to fifteen years because they typically last between eight and twelve years. Always keep in mind that regular maintenance is a wonderful approach to safeguard your investment. Your water heater can endure as long as possible with the help of professional maintenance inspections and maintenance.
Nobody enjoys having a chilly shower or doing the dishes, so it's better to replace your water heater before it fully breaks out. Waiting too long would be considerably worse since a leak could develop, causing costly water damage. To ensure there are no problems in between appointments for expert maintenance, there are a few things you should keep an eye out for. When it's time to install a water heater, keep an eye out for the following indicators: The area surrounding the water heater is corroded and rusted.Periodically check the water heater tank to make sure there hasn't been any corrosion or rust buildup. The area around the temperature and pressure relief valves, as well as the inlet and outlet connectors, are the two areas you must be sure to carefully inspect. Rust and corrosion are more prone to occur in these places. When you have your next planned maintenance appointment, if you are unsure about the location of these locations, ask your technician to show you. You can extend the life of your unit and put off buying a new hot water heater by keeping these areas clean and well-kept. Moreover, keep an eye out for rust-colored water coming from your hot water heater. If so, the interior of your tank is definitely rusting. This kind of damage may eventually lead to a water leak, so you should immediately think about replacing your water heater. You might need to replace your hot water heater if the temperature of your hot water is just tepid or cold. When you crank up the shower taps and the water is frigid or lukewarm, it is a clear sign that your water heater needs to be replaced. When your water doesn't truly get warm or hot at all, it usually indicates a problem rather than a delay in feeling warm water starts to pour out. This is often a clear sign that a water heater needs to be installed. The water heater is surrounded by an outdoor pool. Go around your unit, look for signs of rust and corrosion, and look for any places where water might have pooled. There is almost certainly a leak or break inside your hot water tank if you notice even a small amount of moisture. The heat causes the metal in your tank to fracture and expand, which forces water out of the holes. Due to this, the tank can be leaking, and the water heater might also need to be replaced. How much does it cost to replace a water heater? If your existing water heater is starting to break down, you might be interested in finding out how much a new one might cost. Water heater replacement cost can be impacted by several factors, according to Angie's List, and can range from $795 to $2,800 for the unit and installation. The type of unit you now own and the type you purchase to replace it will depend on these factors. If building codes have changed after your old unit was installed, there can be additional fees. How much it will cost to replace your water heater depends on local labor rates. Discover more about installing a water heater by contacting Elizabeth Drain Service! All the services you require, including professional water heater replacement, are available in one location. Trust the experts at Elizabeth Drain Service if your water heater is showing indicators that it needs to be replaced. Call us or visit elizabethdrainservice.com to get in touch with the plumbing professionals in Elizabeth County. The water heater in your house is essential for keeping the water you need in your home nice and hot, from washing dishes to having a shower. When the water for those dishes and showers suddenly turns ice cold, you'll notice, but you could not discover issues with your water heater while you still have hot water. Problems include a possible leaky water heater, accumulating mineral deposits, strange sounds, or other indicators that your hot water heater needs care. You may save a lot of time, money, and hassles by being proactive and looking for early warning
signals. These are 10 indicators that your water heater may need repair or replacement:
Your water isn't as hot as it once was. The most obvious issue is that the shower and faucet water is not hot! If you've noticed that your showers aren't as steamy as they used to be, it might be a clue that your water heater is on the fritz. Sediment may accumulate at the bottom of your tank over time, insulating the heating components from the water and rendering them ineffective. In many situations, these problems develop in water heaters that have been in operation for many years. Flushing your tank (removing sediments) will frequently help, but it may be time for a new gas or tankless hot water heater if the issue continues. Hot water doesn't last long. Water heaters are designed to quickly hold a large amount of hot water, ready for use. But, if your hot water supply lasts only a short time, there is most certainly a problem with your water heater. There might be many reasons for this, but one typical issue many homeowners confront is a faulty heating element. When the element fails, part of the water in the water heater cannot be heated as fast and runs out before you complete bathing, which is undesirable since no one likes an ice-cold shower or changing water temperatures. Inconsistent water temperature Have you observed your water temperature changing even if you haven't adjusted it? If the water temperature swings between cold, hot, and lukewarm, there is most likely an issue with the water heater. Inconsistent temperatures are usually caused by mineral deposits accumulating within or a heating element failing. Nevertheless, if the water heater is old, it may be best to replace it. Whatever the cause, Elizabeth Plumbing and Drain Service will help you identify the issue and resolve it quickly! Reduced or low water pressure Many factors might be to blame for your low water pressure, but in certain circumstances, it could be due to your water heater. Minerals may frequently collect on heating components or clog water pipelines, limiting water pressure and temperature issues. Water pressure might also deteriorate as a water heater ages. Your water heater leaks Water leaks may be quite detrimental to your property, mainly if they occur in your water heater, which has a steady flow of water and tanks that carry a huge volume of hot water. You must act quickly if water accumulates at the bottom of your water heater. There are several probable reasons for a leaky water heater. It might be a defective hot or cold water connection, a damaged drain valve, loose gaskets, or even rust within the tank; we can generally rectify these issues with a simple repair, but if it's leaking out of the water tank, a repair will not solve your problem. If the leak is not repaired, it will worsen, and you will need to fix any water damage and have a skilled plumber replace your water heater. Weird sounds and noise coming from the water heater Gas water heaters naturally age and begin to make a quiet buzzing sound that isn't worrisome as they work hard over time. Nevertheless, if you've started hearing popping, cracking, or banging sounds from your water heater, it's likely that sediments have accumulated on the bottom of your tank and are now burning when they touch the heating components. While this may not appear to be a big deal at first, this problem will only worsen until sediments block entirely off access to the heating element if left unchecked. At that point, you'll need to replace your anode rod (which may void the appliance's warranty if done yourself) or purchase a new water heater entirely. Cleaning your tank should temporarily solve this issue, but a replacement will be required if sediments continue to accumulate at an accelerated pace. Rusty water or signs of corrosion Rust in your hot water is frequently caused by bacteria development, pipe corrosion, water heater corrosion, or mineral deposits in the water supply. This rusty water look indicates that your anode rod (a metal rod that protects the interior of your tank from corrosion) has failed and needs to be replaced. Anode rods should be examined and changed every 3-5 years, depending on the hardness of your water (the more significant the hardness, the more often they'll need to be replaced). If you don't replace your anode rod on time, the corrosive nature of hard water can eat through the walls of your water heater, creating leaks and needing repair or replacement. If there is rust or corrosion on the water heater's exterior, it has deteriorated. Yet, the pipes may be corroding instead. Elizabeth Plumbing and Drain Service specialists can assist you in identifying the problem and taking the required measures to remedy it. Unpleasant smelling cloudy water Is your water murky and odorous? This might be due to silt buildup or bacterial illness inside the water heater. When this occurs, you should call a local expert plumber as soon as possible to fix the problem, as the water might become unsafe to use. Tank won't drain through the drain valve. Mineral deposits accumulate in your water heater's drain pipe over time, so get it cleaned out at least once a year. If there is too much sediment in the drain line, water may not flow readily from the water heater's drain valve, and it may not drain at all. It may be time for a hot water heater repair when this occurs. Your energy bills have increased unexpectedly. Assume you've discovered that your energy expenses have progressively climbed over time for no reason. In such an instance, sediments may have accumulated within your heater and shield the heating elements from the water, causing them to work harder (and use more energy) to heat the same quantity of water as previously. This issue is generally resolved by washing away the silt, which no longer insulates the heating components. Nonetheless, if the problem continues, it may be time to replace the water heater. Depending on how old your present unit is, replacing it with a newer one may save you money in the long term due to greater energy efficiency! Do You Have Problems With Your Water Heater? Even if you have regular maintenance or have had your water heater fixed in the past, problems with your water heater must be treated swiftly so that they do not progress into more severe difficulties. It's critical to get your water heater tested at least once a year to discover any issues sooner rather than later. Elizabeth Plumbing and Drain Service's water heater replacement and repair professionals can diagnose and address any problems with your water heater, from a simple repair to a complete replacement. Why Your Toilet SweatsThe shivering toilet. This is a moist, drippy, and all-too-common issue for Chicagoland homes, and if left untreated, it may spread and cause severe damage to bathroom flooring.
So, what exactly is causing your toilet to sweat, and what can you do to stop it before it causes mold, mildew, and water damage? The good news is that the sweating dampness on the exterior of your toilet isn't the result of a leak or a plumbing backlog - so don't freak out! Instead, sweat is merely condensation, frequently induced by a temperature difference. Condensation will build if the water temperature within your toilet tank is significantly different from the temperature of your room. This is why most toilets sweat in the spring and summer (just like humans); the cold water in your toilet tank causes the tank's surface to cool. Condensation - or "sweat" - occurs when this cool surface touches your bathroom's warm, humid air. Small drips and droplets might migrate down your toilet and splash on the floor below when there is too much condensation. Therefore, although a trickle here and there may not be enough to cause concern, a "drip here and there" over time may quickly pile up. Mold and rotting may arise as a consequence of continuous moisture, necessitating the replacement of the flooring foundation surrounding the toilet or the whole bathroom floor. How to Stop It So, how can you combat that awful, watery "sweat"? An anti-sweat valve, which connects the cold water line to your toilet and may also be connected to your hot water, is your best bet for preventing condensation from accumulating. The valve may transfer warm water to the cooler water in your tank, bringing the water temperature back to room temperature. If hiring a plumber to install this hardware does not seem feasible, there are a few do-it-yourself options you might consider: Cover the tank: Wrap a towel or other absorbent material around the tank's exterior to remove leaking moisture. Insulate the tank: They are available in-store and are comprised of protective materials such as foam, which adhere to the interior of your tank and help prevent it from becoming too cold. Use a ventilation fan in your bathroom: This will assist in lessening the general humidity and warmth of the bathroom, reducing the likelihood of your toilet sweating. Lower the temperature of your shower/bath: This also reduces the quantity of heat and humidity in the space. Buy a water-saving toilet: Less water in your tank allows for less condensation to build. Buy a toilet with a temperature-increasing (tempering) tank: A second tank will pre-warm the water before it enters the bigger tank. If you arrive home to a pool of water beneath your water heater, it's time to investigate more. Water leaks might indicate a problem with your water heater that requires repair. We'll review some of the most frequent reasons why water heaters leak and what you can do about it. We also offer some useful hints and ideas on how to maintain your water heater so that you may prevent expensive repairs in the future.
Step 1: Ruling Out CondensationYou see water on the floor near your water heater and suspect a problem. Then, you must rule out any additional sources of water. Condensation may be a source of water surrounding your water heater. Condensation on a Gas Hot Water HeaterHigh-efficiency gas water heaters may create harmless condensate that is a leak. Here's how to see condensation:
Condensation on an Electric Water HeaterOne source of condensation with an electric water heater is the hot cylinder tank positioned in a chilly room. Wiping down the exterior of your hot water heater and then observing to see whether the moisture returns in a similar pattern over the water heater surface will test for condensation. If so, it is most likely condensation. Look for Other CausesIf your HVAC system is in the same room as your hot water heater, check to be sure the cause of the leak isn't your AC or furnace or any other linked systems, such as water softener lines. Examine the water supply pipes that also transport water to your water heater. The issue might be caused by leaking lines or pipes positioned above or below the water heater (keep reading to learn about fixes). Step 2: Turn Off the Power SupplyIf you've established that the water heater is leaking, switch off the gas (for gas heaters) or the power (for electric heaters) (for electric heaters). Water and electricity do not mix. Thus this is an important step that you should always pay attention to! If you need more confidence in dealing with gas or electric water heaters, now is the time to hire a professional. Don't meddle with any gas pipes; leave it to the professionals. Locating Your Gas Shut-Off ValveThe directions for turning off the gas valve are usually on the front of your water heater. If it doesn't work, search for the shut-off valve near your water heater. It is normally positioned at the top of the heater and has a knob or lever that you may move to switch off the gas supply altogether. Locating Your Power BreakerIf you have an electric water heater, ensure that the circuit breakers in your electrical panel are turned off. If you need help figuring out which breaker controls the water heater, search for a label on your electric panel or utilize a schematic on the door of your board to assist you in discovering the proper breaker. After you've located it, turn it off. Step 3: Turn Off the Water SupplyAnother precaution is to switch off your water supply completely. To begin, find and turn off your main cutoff valve. This is often located in the basement or along the curb. In addition to cutting off the main water supply, you should also cut off the cold water supply for your hot water heater. Look for two valves on your hot water heater: hot water and cold water. Your hot water supply is often labeled in red, while your cold water supply is labeled in blue. Turning off the cold water can assist in avoiding future water damage caused by leaky water. Step 4: Establishing The Source of Your LeakNow that you've turned off the gas/electricity, the main line, and the cold line supply, it's time to locate the cause of your water heater leak. Common Reasons for a Leaking Water HeaterA defective or failed pressure release valve is the most typical cause of water heater leakage. This valve keeps pressure from building up in the water tank, and if it breaks, hot water might begin to spill out. Some possible reasons include the following:
It's critical to understand which of these factors is causing your leak so that you can perform the required repairs yourself or hire a professional. Water Leaking From The TopPooling water at the top of your water heater might be your cold or hot water inlets, which carry water into the tank to be heated and then out into your pipes as needed. Leaking from the top of your water heater might be caused by loose pipe connections. Solution: Tighten the cold and hot water input pipes with a pipe wrench. Water Leaking From The SideWater seeping from the side of your heater is most likely your temperature pressure relief valve. The temperature pressure relief valve is a precautionary measure. that enables hot water and steam to exit the tank if there is too much pressure. Solution: Ensure the temperature is not higher than the recommended 120 degrees. If the temperature is appropriately regulated but leaks persist, the valve is faulty and must be replaced. Water Leaking From The BottomIf you find water leaking from the base of your water heater, it might be due to a problem with the drain valve. The drain valve is intended to empty the water tank as necessary, such as during maintenance. Solution: Check the drain valve for corrosion and replace it. If there is no rust, tighten the valve slightly but not too much, as this might cause harm. If tightening does not work, replacement may be required. Additional Potential Problems If you still have unexplained water gathering behind your water heater, it might be due to a faulty anode rod or a fracture. Determining whether your problem is caused by an anode rod requires considerable investigation, which typically necessitates contacting a specialist. However, if your leak is caused by a break in your hot water heater, it is not a fast fix. You'll need a new water heater. In each of these cases, the best thing to do is contact an expert to analyze the problem and establish future measures. Step 6: Frequent maintenance can help you avoid future problems.If your hot water heater is leaking but not exhibiting any of the symptoms above, the cause might be a buildup of silt or mineral deposits. Flush your water heater once a year as part of routine maintenance and preventive care. This may prevent expensive repairs due to buildup and lessen the likelihood of a leak. To maintain your hot water heater functioning effectively, you should inspect it on a regular basis for symptoms of leaking or damage. If you spot a problem, call a professional immediately to examine the situation and ensure that your hot water is safe to use. You may prevent expensive repairs due to a leaky system and keep your hot water flowing smoothly if you take the time to maintain your water heater and check for any symptoms of damage. Repairing or Replacing Your Water HeaterWater heaters are important to keeping our homes pleasant, but they need regular maintenance. If you discover water leaking from your water heater, you must act promptly. Check the system for apparent symptoms of deterioration. If your water heater is over ten years old or you mend it often, it may be time to hire a professional to replace it. A new water heater comes with a host of advantages:
Whether tank or tankless, the expense of a new water heater may seem frightening initially, but the long-term savings on monthly energy costs and peace of mind will pay out in the end. Orange rust stains on toilet bowls could be more appealing, particularly if you intend to have friends around. Rust stains may accumulate in your toilet if not correctly cared for and maintained with proper drain cleaning. Stain prevention requires regular cleaning with the proper solutions. Rust stains are difficult to remove with many products. Efficiently, and some may even cause them to become permanent. So, it is crucial to comprehend. What causes rust stains, and how to remove them thoroughly. Here's how to remove rust spots from your toilet:
What Causes Toilet Rust Stains?Toilet tank parts made of untreated metal, iron germs, rusted water heaters, iron plumbing lines, or iron particles in the water cause rust stains in toilet bowls. They are typically seen in homes that utilize well water in hard-water locations. Rust particles may stick to bathroom fixtures' enamel or porcelain surfaces due to a combination of minerals in the water and iron bacteria. Even after cleaning, stains will resurface if the water is not filtered or treated with a water-softening system. How to Remove a Rust Stain from a Toilet Bowl If you discover rust in your toilet bowl, you will need the following: Tools/Equipment
Instructions Use Citric AcidCitric acid may be used to effectively remove rust stains from toilet bowls. It may be made from fresh grapefruits, limes, lemons, or powdered citric acid purchased at medicine or supermarket shops. Dip the edge of fresh citrus fruit in baking soda or salt to offer a soft abrasive for washing rust spots. Use baking soda and lemon juice paste in areas with thick stains. Cover the paste with plastic wrap to keep it wet, and let it aside or longer to aid in the breakdown of rust particles. If you're using citric acid powder, prepare a mixture of a paste and a few drops of water and apply it straight to the discolored area. Remove the discoloration with elbow grease and an old toothbrush or scrub brush. Distilled White VinegarDistilled white vinegar is another excellent toilet bowl rust remover. It includes acetic acid, which may help prevent rust stains from becoming permanent if applied every week. Cleaning vinegar, rather than food-grade vinegar, has a more excellent acidity that is more effective for tough rust stains. Scrub the colors with a toilet brush after adding one or two cups of vinegar to the toilet bowl. For older stains, drain the toilet bowl and pour in undiluted vinegar, letting it soak overnight (or at least two hours). Scrub it well and rinse it with clean water. Cream of TartarCream of tartar, a powdered version of tartaric acid often used in baked products, is an excellent rust remover. Apply a paste with a few drops of water to toilet bowl stains. Let it take some time to work, then cover the area with plastic wrap to keep the paste wet. Add Gentle AbrasivesMild abrasives such as table salt, pumice powder, or baking soda may be used with acid cleansers or alone. They are soft enough not to harm the porcelain finishes of toilets. To get the greatest results, use cleaner or water to moisten the stained surface and keep the area wet while applying the abrasive. Pumice is a naturally occurring volcanic rock that may be found in powder or solid form. Limescale, hard water, and rust stains may be removed using pumice stones or sticks. Use Commercial Rust RemoversOn the market, several commercial rust removers efficiently remove stains. While some are harsher than others, take the time to read the labels thoroughly, follow the advice, and store and dispose of goods properly. How to Clean a Toilet Tank of Rust You'll need the following items to remove rust spots from the toilet tank: Tools/Equipment
Materials
Instructions Find the Water Valve First, you must empty the water tank. If you need to halt the water flow, look for the control valve on the wall behind the tank or at the toilet's base. To stop the flow of water, turn it counterclockwise. Empty the TankRemove the tank cover and place it someplace out of the way. Flush the toilet many times until the tank is empty. Depending on the reservoir size, you may need to flush it twice or thrice. Assess the TankIf you have a fresh tank or reside in a water-rich location, you may need to scrub the tank well with a disinfecting cleaner. If there is rusty staining on the tank's bottom or a hard ring of minerals towards the top, you must thoroughly clean the tank with vinegar. Use a Disinfectant CleanerSpray a disinfecting cleanser inside the tank's walls and floor and let it for 10 minutes or longer before cleaning it away. Wash away any filth using a long-handled scrub brush, delving into the tank's bottom and corners. Finally, using a moistened sponge and disinfecting cleaner, clean the "functioning components" of the toilet. Wipe down the flapper, handlebar or handle chain, ball float, and refill tube components. Spray cleaner on the sponge to avoid using too much cleaning and rusting metal components. Reopen the water valve and allow the tank to refill. Then, flush several times to remove the dislodged dirt and cleaner. Utilize Distilled White VinegarRemove the top of the tank and fill it with distilled white vinegar until it reaches the level of the overflow valve. It might take up to three gallons of vinegar, depending on the side of the tank. Let it rest for 12 hours before flushing the vinegar away to empty the tank. Afterward, proceed in the same manner as with the disinfecting cleaner. Do you need a plumber in Elizabeth, NJ? Elizabeth Plumbing and Drain Service is the answer. Please let us know if you're interested in our services. Get in touch with us at (908) 304-9983. Your pipes are much more likely to freeze and rupture when it's cold outside. One of the most frequent causes of property damage in cold weather, according to the Insurance Institute for Business and Home Safety, is burst pipes, which can result in thousands of dollars in water damage. The simplest approach to avoid this pricey problem is to hire a trustworthy plumber after following a few winter plumbing maintenance pieces of advice.
All of your winter plumbing repair needs can be met by Elizabeth Drain Service. But, you are also capable of handling certain simple tasks on your own. These are five straightforward plumbing tips for the chilly months: #1 The external hose needs to be disconnected.When it's cold outside, your outdoor hose often has troubles initially. Disconnecting and storing all of your outdoor hoses is one of the most important suggestions for preventing your pipes from freezing. To ensure that your hose is securely stored before the first cold front, complete this step as soon as you can. Find the outdoor faucet shut-off valves and close them during the cold weather. #2 Look for leaks around your house.Moreover, the fall is a wonderful time to check your home for plumbing issues. Make a note of any faucets or shower heads that have little water pressure. Any leaks you discover should be addressed by a specialist immediately soon. Any magnitude of a little leak can accumulate over time, wasting water and raising your utility expenditures. #3 Try to keep your home at a comfortable temperature at all times.Despite the obviousness of this advice, follow it to prevent your pipes from freezing and maintain a comfortable home. Homes with low interior temperatures are more likely to experience pipe bursts. You should have your thermostat set and switch on, and you should maintain a minimum inside temperature of 55 degrees. #4 Make sure the clogs in your sinks aren't getting worse.Using your sink as a garbage disposal is a bad idea. When it's chilly outside, especially in the winter, oils, and fats that are flushed down the drain may freeze. This could cause problematic clogs in your drains and additional issues during drain cleaning. Make sure you properly dispose of grease and keep your drains accessible to prevent your pipes from freezing when it gets cold outside. #5 Make sure your pipes are inspected.If you've never had your pipes examined, you can hire a plumber to make sure they're in working order in time for the coming winter. They might protect your property from bursting pipes by insulating and, if necessary, repairing broken pipes. Don't gamble since a burst pipe might dramatically change a homeowner's life. Plumbing maintenance during the winter? Call Elizabeth Drain Service now!Elizabeth Drain Service strives to serve as your go-to provider for all plumbing needs in Elizabeth County. All varieties of residential and commercial plumbing, including kitchen and bathroom plumbing, emergency plumbing services, sewage line repair, sewer line inspection, gas line repair, and much more, are handled by our specialists. Maintenance on winterized plumbing falls under this. Call us at (908) 988-0365 right immediately or visit our website to find out how we can help you. Spring is rapidly approaching, which means it's time to have your commercial plumbing inspected and cleaned. Over the winter, your plumbing pipes could get pretty grimy. If you don't want to have to make any expensive repairs or unexpected breaks, now is the time to perform plumbing maintenance on your building. With the use of the five quick actions described below, commercial plumbing may be spring-ready.
Observe the drain lines.The drain lines at your company have clogged as a result of the accumulation of grime, grease, soap suds, and dirt throughout the fall and winter. Seasonal temperature variations may cause a drainage leak or a plumbing clog in your company, which would allow unpleasant odors to infiltrate your facility. Call your neighborhood plumber to inspect and clean the drain pipes to avoid any water damage or further emergency cleanup expenses. You can prevent water damage and high emergency cleanup charges by performing short, preventative maintenance procedures on the drain lines. Shining fixtures Even drain lines don't always need maintenance. Each component of your commercial plumbing system has to be cleaned and inspected. A plumber will examine and clean the pipes before spring to guarantee worry-free operation all through the next year. The maintenance of water tanks should be done by a competent plumber who will check the water pressure and look for corrosion in the unit. Commercial plumbing services can assist you in preventing issues like the building's insufficient hot water supply or a water leak in the utility room. Once all business plumbing fixtures have been inspected, cleaned, and restored, your fixtures will still look brand new. Check your faucets for leakage. Check for hidden leaks if you notice water damage around the building or if your water bills are higher than usual. Every day, hundreds of gallons of water might be lost due to faulty faucets. You may check for hidden leaks in the building by turning on every faucet. Next, you can look for leaks by opening the cabinets that contain the faucets. If you find a leak or see anything odd, make repairs by calling a nearby plumbing company. Industrial plumbing services may protect your building, lower your water expenses, and secure your business from future, more expensive repairs. Think about installing modern industrial plumbing systems. Spring cleaning is a perfect time to consider fixture upgrades for your commercial plumbing system. To give your building a contemporary, updated appearance, a skilled plumber will carefully install new fixtures. Commercial plumbing services may also involve changing the fixtures to avoid maintenance problems with old ones. While you're at it, discuss water-saving low-flow options and contemporary fixtures with your plumber. Get the Services of a Qualified Business Plumbing Company If you want to get your business ready for spring cleaning, working with a trained plumber with experience in industrial plumbing is crucial. Emergency plumbing repairs are inconvenient, and wasting water will deplete your funds. Take proactive actions with industrial plumbing repair to save time and money. Elizabeth Drain Service offers its commercial clients the best plumbing system upgrading services in Elizabeth County. Excellent local plumbing services in Elizabeth County! Elizabeth Drain Service, a locally owned and operated business with over 30 years of expertise, is the go-to plumbing company for all of Elizabeth County and the surrounding districts. Whether they are straightforward underground utilities for residential plumbing applications or complex underground utilities for commercial plumbing applications, we have the know-how to meet all of your plumbing demands. Each client receives plumbing services of the finest caliber at reasonable costs. Keep your plumbing system in great form and steer clear of unanticipated complications by arranging a commercial plumbing system. The myth that an ostrich conceals its head in the sand to avoid danger is false. However, it is not a myth that many New Jersey homeowners would ignore plumbing problems believing they will disappear.
It's more complex than Drip, Drip, Drip. As problems seldom disappear, this thinking style could be an expensive mistake. They often develop into more severe plumbing issues that require more money. Our plumbers at Elizabeth Plumbing and Drain service advise addressing problems as soon as they appear to avoid spending more money in the long run. These 5 Common Plumbing Issues Will Cost You MoneyHere are the top five most frequent plumbing concerns, according to our experts: 1. Leaky faucet A common drain cleaning and plumber issue is a leaking faucet, equivalent to flushing money down the toilet. You may pay a 10% increase in water expenses due to wasted water. Do you still have reservations? A leaky faucet may waste up to 10,000 gallons of water each year, according to the US Environmental Protection Agency (EPA). This results in around 270 loads of laundry. The good news is that a leak can be fixed faucet is often simple. 2. Running toilet A running toilet may waste hundreds of gallons of water each year, increasing your water bill. Depending on the toilet's constant running source, this problem may be simple. Sometimes the solution is as easy as straightening up the flapper chain in the tank or fixing the crookedly positioned flapper on the drain. Both of these issues cause frequent water leaks, preventing the tank from ever becoming filled. It could be enough to replace the flapper valve, float, or fill tube. 3. Wrong-sized sump pump Making sure your sump pump is the right size for your property is more crucial than you think. If your pump is too tiny, it may get overworked and need a continual operation to keep up with the water flow in your Elizabeth house. This might result in pump burnout or increased energy costs. Alternatively, the pump may be unable to keep up, causing the basement to flood. The use of an appropriate-sized sump pump avoids and overcomes these issues. If you suspect your pump is the wrong size for your property, please contact one of our Elizabeth Plumbing and Drain services. Our plumbers are all very talented and educated. 4. Water heater is making noises If your water heater starts making loud banging sounds, don't expect them to disappear. The most typical cause is silt buildup in the tank's bottom. When the hot water is turned on, the sediment circulates, causing air bubbles to form. Between the bubbles and the residue, there may be hammering noises. Ignoring this issue costs money since it reduces the life of your tank. So, as soon as you hear the noises, call one of our experienced plumbers. To avoid this in the first place, have your tank drained and sanitized once a year. For more information. 5. Dripping sounds in walls or ceiling If there is a water leak in your Elizabeth home's subsurface plumbing, the walls or ceiling may begin to drip. This might result in mold growth and expensive repairs such as repairing drywall, plaster, or deteriorating wood. You've undoubtedly seen the gradual erosion of rocks caused by even small amounts of water. Simply said, the materials in your house are far more prone to wear and tear. If you hear leaks, please contact one of our plumbers right once. If you overlook drips, you will wind up paying more money in the long run. It is best to learn as soon as possible rather than later. Elizabeth Plumbing and Drain Service is here to help you with your plumbing needs. These are a few more frequent plumbing issues that our Elizabeth Plumbing and Drain service handles daily in Elizabeth, New Jersey, homes. If you detect any of these plumbing problems in your house, contact us at (908) 988-0365 or request assistance online to save money in the long term. We are here to assist |
Archives
May 2023
Categories
All
|