Elizabeth Drain Service
  • Plumbers / Drain Service
  • Plumbing Services
    • Boiler Repair - Replace
    • Clogged Drains and Sewer Lines
    • Faucet Replacement
    • Furnace Installation & Replacement
    • Furnace Service & Maintenance
    • General Plumbing Repairs
    • Heat Pump Service & Maintenance
    • Hot Water Heater Repair Replace
    • Humidity Control & Dehumidification
    • New Supply and Drain Lines
    • Toilet and Vanity Replacement
  • About Us
  • Privacy Policy
  • Contact Us
  • Areas We Service
    • Plumber Bayonne
    • Plumber Belleville
    • Plumber Carlstadt
    • Plumber Edgewater
    • Plumber Hoboken
    • Plumber Jersey City
    • Plumber Kearny
    • Plumber Lodi
    • Plumber Lyndhurst
    • Plumber Newark
    • Plumber North Arlington
    • Plumber North Bergen
    • Plumber Palisades Park
    • Plumber Ridgefield Park ​
    • Plumber Rutherford
    • Plumber Secaucus
    • Plumber Teaneck
    • Plumber Union City
    • Plumber West New York
    • Plumber Weehawken
  • Blog

Indications that your water heater should be serviced or replaced

3/27/2023

0 Comments

 
The water heater in your house is essential for keeping the water you need in your home nice and hot, from washing dishes to having a shower. When the water for those dishes and showers suddenly turns ice cold, you'll notice, but you could not discover issues with your water heater while you still have hot water. Problems include a possible leaky water heater, accumulating mineral deposits, strange sounds, or other indicators that your hot water heater needs care. You may save a lot of time, money, and hassles by being proactive and looking for early warning 
signals. These are 10 indicators that your water heater may need repair or replacement:

  1. More hot than it once was is your water.
  2. Hot water does not last long.
  3. Inconsistent water temperature
  4. Decreased or low water pressure
  5. Your water heater is leaking
  6. Strange sounds and noises coming from the water heater
  7. Corrosion or rusty water
  8. Cloudy, unpleasant-smelling water
  9. The tank is not draining via the drain valve.
  10. Your energy expenses have risen suddenly.

Your water isn't as hot as it once was.
The most obvious issue is that the shower and faucet water is not hot! If you've noticed that your showers aren't as steamy as they used to be, it might be a clue that your water heater is on the fritz. Sediment may accumulate at the bottom of your tank over time, insulating the heating components from the water and rendering them ineffective. In many situations, these problems develop in water heaters that have been in operation for many years. Flushing your tank (removing sediments) will frequently help, but it may be time for a new gas or tankless hot water heater if the issue continues.

Hot water doesn't last long.
Water heaters are designed to quickly hold a large amount of hot water, ready for use. But, if your hot water supply lasts only a short time, there is most certainly a problem with your water heater. There might be many reasons for this, but one typical issue many homeowners confront is a faulty heating element. When the element fails, part of the water in the water heater cannot be heated as fast and runs out before you complete bathing, which is undesirable since no one likes an ice-cold shower or changing water temperatures.

Inconsistent water temperature
Have you observed your water temperature changing even if you haven't adjusted it? If the water temperature swings between cold, hot, and lukewarm, there is most likely an issue with the water heater. Inconsistent temperatures are usually caused by mineral deposits accumulating within or a heating element failing. Nevertheless, if the water heater is old, it may be best to replace it. Whatever the cause, Elizabeth Plumbing and Drain Service will help you identify the issue and resolve it quickly!

Reduced or low water pressure
Many factors might be to blame for your low water pressure, but in certain circumstances, it could be due to your water heater. Minerals may frequently collect on heating components or clog water pipelines, limiting water pressure and temperature issues. Water pressure might also deteriorate as a water heater ages.

Your water heater leaks
Water leaks may be quite detrimental to your property, mainly if they occur in your water heater, which has a steady flow of water and tanks that carry a huge volume of hot water. You must act quickly if water accumulates at the bottom of your water heater. There are several probable reasons for a leaky water heater. It might be a defective hot or cold water connection, a damaged drain valve, loose gaskets, or even rust within the tank; we can generally rectify these issues with a simple repair, but if it's leaking out of the water tank, a repair will not solve your problem. If the leak is not repaired, it will worsen, and you will need to fix any water damage and have a skilled plumber replace your water heater.

Weird sounds and noise coming from the water heater
Gas water heaters naturally age and begin to make a quiet buzzing sound that isn't worrisome as they work hard over time. Nevertheless, if you've started hearing popping, cracking, or banging sounds from your water heater, it's likely that sediments have accumulated on the bottom of your tank and are now burning when they touch the heating components. While this may not appear to be a big deal at first, this problem will only worsen until sediments block entirely off access to the heating element if left unchecked. At that point, you'll need to replace your anode rod (which may void the appliance's warranty if done yourself) or purchase a new water heater entirely. Cleaning your tank should temporarily solve this issue, but a replacement will be required if sediments continue to accumulate at an accelerated pace.

Rusty water or signs of corrosion
Rust in your hot water is frequently caused by bacteria development, pipe corrosion, water heater corrosion, or mineral deposits in the water supply. This rusty water look indicates that your anode rod (a metal rod that protects the interior of your tank from corrosion) has failed and needs to be replaced. Anode rods should be examined and changed every 3-5 years, depending on the hardness of your water (the more significant the hardness, the more often they'll need to be replaced). If you don't replace your anode rod on time, the corrosive nature of hard water can eat through the walls of your water heater, creating leaks and needing repair or replacement.

If there is rust or corrosion on the water heater's exterior, it has deteriorated. Yet, the pipes may be corroding instead. Elizabeth Plumbing and Drain Service specialists can assist you in identifying the problem and taking the required measures to remedy it.

Unpleasant smelling cloudy water
Is your water murky and odorous? This might be due to silt buildup or bacterial illness inside the water heater. When this occurs, you should call a local expert plumber as soon as possible to fix the problem, as the water might become unsafe to use.

Tank won't drain through the drain valve.
Mineral deposits accumulate in your water heater's drain pipe over time, so get it cleaned out at least once a year. If there is too much sediment in the drain line, water may not flow readily from the water heater's drain valve, and it may not drain at all. It may be time for a hot water heater repair when this occurs.

Your energy bills have increased unexpectedly.
Assume you've discovered that your energy expenses have progressively climbed over time for no reason. In such an instance, sediments may have accumulated within your heater and shield the heating elements from the water, causing them to work harder (and use more energy) to heat the same quantity of water as previously. This issue is generally resolved by washing away the silt, which no longer insulates the heating components. Nonetheless, if the problem continues, it may be time to replace the water heater. Depending on how old your present unit is, replacing it with a newer one may save you money in the long term due to greater energy efficiency!

Do You Have Problems With Your Water Heater?
Even if you have regular maintenance or have had your water heater fixed in the past, problems with your water heater must be treated swiftly so that they do not progress into more severe difficulties. It's critical to get your water heater tested at least once a year to discover any issues sooner rather than later. Elizabeth Plumbing and Drain Service's water heater replacement and repair professionals can diagnose and address any problems with your water heater, from a simple repair to a complete replacement.

​
0 Comments

What Causes Toilet Sweating and How Can I Stop It?

3/25/2023

0 Comments

 
Picture
Why Your Toilet SweatsThe shivering toilet. This is a moist, drippy, and all-too-common issue for Chicagoland homes, and if left untreated, it may spread and cause severe damage to bathroom flooring.
So, what exactly is causing your toilet to sweat, and what can you do to stop it before it causes mold, mildew, and water damage?

The good news is that the sweating dampness on the exterior of your toilet isn't the result of a leak or a plumbing backlog - so don't freak out! Instead, sweat is merely condensation, frequently induced by a temperature difference.

Condensation will build if the water temperature within your toilet tank is significantly different from the temperature of your room. This is why most toilets sweat in the spring and summer (just like humans); the cold water in your toilet tank causes the tank's surface to cool. Condensation - or "sweat" - occurs when this cool surface touches your bathroom's warm, humid air.

Small drips and droplets might migrate down your toilet and splash on the floor below when there is too much condensation. Therefore, although a trickle here and there may not be enough to cause concern, a "drip here and there" over time may quickly pile up.
Mold and rotting may arise as a consequence of continuous moisture, necessitating the replacement of the flooring foundation surrounding the toilet or the whole bathroom floor.

How to Stop It
So, how can you combat that awful, watery "sweat"?
An anti-sweat valve, which connects the cold water line to your toilet and may also be connected to your hot water, is your best bet for preventing condensation from accumulating. The valve may transfer warm water to the cooler water in your tank, bringing the water temperature back to room temperature.

If hiring a plumber to install this hardware does not seem feasible, there are a few do-it-yourself options you might consider:

Cover the tank: Wrap a towel or other absorbent material around the tank's exterior to remove leaking moisture.

Insulate the tank: They are available in-store and are comprised of protective materials such as foam, which adhere to the interior of your tank and help prevent it from becoming too cold.

Use a ventilation fan in your bathroom: This will assist in lessening the general humidity and warmth of the bathroom, reducing the likelihood of your toilet sweating.

Lower the temperature of your shower/bath: This also reduces the quantity of heat and humidity in the space.

Buy a water-saving toilet: Less water in your tank allows for less condensation to build.

Buy a toilet with a temperature-increasing (tempering) tank: A second tank will pre-warm the water before it enters the bigger tank.

​
0 Comments

What Is Causing My Hot Water Heater to Leak?

3/23/2023

0 Comments

 
If you arrive home to a pool of water beneath your water heater, it's time to investigate more. Water leaks might indicate a problem with your water heater that requires repair. We'll review some of the most frequent reasons why water heaters leak and what you can do about it. We also offer some useful hints and ideas on how to maintain your water heater so that you may prevent expensive repairs in the future.

Step 1: Ruling Out CondensationYou see water on the floor near your water heater and suspect a problem. Then, you must rule out any additional sources of water. Condensation may be a source of water surrounding your water heater.

Condensation on a Gas Hot Water HeaterHigh-efficiency gas water heaters may create harmless condensate that is a leak. Here's how to see condensation:
  • Clean up any water that has accumulated under the heater.
  • Set the gas control valve to OFF.
  • Wait several hours to observe whether it is still moist beneath the heater.
  • The absence of water indicates that the heater was condensing.

Condensation on an Electric Water HeaterOne source of condensation with an electric water heater is the hot cylinder tank positioned in a chilly room. Wiping down the exterior of your hot water heater and then observing to see whether the moisture returns in a similar pattern over the water heater surface will test for condensation. If so, it is most likely condensation.

Look for Other CausesIf your HVAC system is in the same room as your hot water heater, check to be sure the cause of the leak isn't your AC or furnace or any other linked systems, such as water softener lines. Examine the water supply pipes that also transport water to your water heater. The issue might be caused by leaking lines or pipes positioned above or below the water heater (keep reading to learn about fixes).

Step 2: Turn Off the Power SupplyIf you've established that the water heater is leaking, switch off the gas (for gas heaters) or the power (for electric heaters) (for electric heaters). Water and electricity do not mix. Thus this is an important step that you should always pay attention to! If you need more confidence in dealing with gas or electric water heaters, now is the time to hire a professional. Don't meddle with any gas pipes; leave it to the professionals.

Locating Your Gas Shut-Off ValveThe directions for turning off the gas valve are usually on the front of your water heater. If it doesn't work, search for the shut-off valve near your water heater. It is normally positioned at the top of the heater and has a knob or lever that you may move to switch off the gas supply altogether.

Locating Your Power BreakerIf you have an electric water heater, ensure that the circuit breakers in your electrical panel are turned off. If you need help figuring out which breaker controls the water heater, search for a label on your electric panel or utilize a schematic on the door of your board to assist you in discovering the proper breaker. After you've located it, turn it off.

Step 3: Turn Off the Water SupplyAnother precaution is to switch off your water supply completely. To begin, find and turn off your main cutoff valve. This is often located in the basement or along the curb.
In addition to cutting off the main water supply, you should also cut off the cold water supply for your hot water heater. Look for two valves on your hot water heater: hot water and cold water. Your hot water supply is often labeled in red, while your cold water supply is labeled in blue. Turning off the cold water can assist in avoiding future water damage caused by leaky water.

Step 4: Establishing The Source of Your LeakNow that you've turned off the gas/electricity, the main line, and the cold line supply, it's time to locate the cause of your water heater leak.

Common Reasons for a Leaking Water HeaterA defective or failed pressure release valve is the most typical cause of water heater leakage. This valve keeps pressure from building up in the water tank, and if it breaks, hot water might 
begin to spill out. Some possible reasons include the following:
  • A water heater tank that is broken or rusted
  • Fittings and pipe connections that are loose or defective
  • Temperature and pressure relief valves placed incorrectly
  • The anode rod is worn out to protect the hot water tank from corrosion

It's critical to understand which of these factors is causing your leak so that you can perform the required repairs yourself or hire a professional.

Water Leaking From The TopPooling water at the top of your water heater might be your cold or hot water inlets, which carry water into the tank to be heated and then out into your pipes as needed. Leaking from the top of your water heater might be caused by loose pipe connections.

Solution: Tighten the cold and hot water input pipes with a pipe wrench.

Water Leaking From The SideWater seeping from the side of your heater is most likely your temperature pressure relief valve. The temperature pressure relief valve is a precautionary measure. that enables hot water and steam to exit the tank if there is too much pressure.

Solution: Ensure the temperature is not higher than the recommended 120 degrees. If the temperature is appropriately regulated but leaks persist, the valve is faulty and must be replaced.

Water Leaking From The BottomIf you find water leaking from the base of your water heater, it might be due to a problem with the drain valve. The drain valve is intended to empty the water tank as necessary, such as during maintenance.

Solution: Check the drain valve for corrosion and replace it. If there is no rust, tighten the valve slightly but not too much, as this might cause harm. If tightening does not work, replacement may be required.

Additional Potential Problems
If you still have unexplained water gathering behind your water heater, it might be due to a faulty anode rod or a fracture. Determining whether your problem is caused by an anode rod requires considerable investigation, which typically necessitates contacting a specialist. However, if your leak is caused by a break in your hot water heater, it is not a fast fix. You'll need a new water heater. In each of these cases, the best thing to do is contact an expert to analyze the problem and establish future measures.

Step 6: Frequent maintenance can help you avoid future problems.If your hot water heater is leaking but not exhibiting any of the symptoms above, the cause might be a buildup of silt or mineral deposits. Flush your water heater once a year as part of routine maintenance and preventive care. This may prevent expensive repairs due to buildup and lessen the likelihood of a leak.

To maintain your hot water heater functioning effectively, you should inspect it on a regular basis for symptoms of leaking or damage. If you spot a problem, call a professional immediately to examine the situation and ensure that your hot water is safe to use.

You may prevent expensive repairs due to a leaky system and keep your hot water flowing smoothly if you take the time to maintain your water heater and check for any symptoms of damage.

Repairing or Replacing Your Water HeaterWater heaters are important to keeping our homes pleasant, but they need regular maintenance. If you discover water leaking from your water heater, you must act promptly. Check the system for apparent symptoms of deterioration. If your water heater is over ten years old or you mend it often, it may be time to hire a professional to replace it.

A new water heater comes with a host of advantages:
  • high energy efficiency heating
  • improved safety features
  • energy savings
  • warranty

Whether tank or tankless, the expense of a new water heater may seem frightening initially, but the long-term savings on monthly energy costs and peace of mind will pay out in the end.

​
0 Comments

How to Get Rid of Rust Stains on Your Toilet

3/21/2023

0 Comments

 
Orange rust stains on toilet bowls could be more appealing, particularly if you intend to have friends around. Rust stains may accumulate in your toilet if not correctly cared for and maintained. Stain prevention requires regular cleaning with the proper solutions. Rust stains are difficult to remove with many products. Efficiently, and some may even cause them to become permanent. So, it is crucial to comprehend. What causes rust stains, and how to remove them thoroughly. Here's how to remove rust spots from your toilet:

What Causes Toilet Rust Stains?Toilet tank parts made of untreated metal, iron germs, rusted water heaters, iron plumbing lines, or iron particles in the water cause rust stains in toilet bowls. They are typically seen in homes that utilize well water in hard-water locations. Rust particles may stick to bathroom fixtures' enamel or porcelain surfaces due to a combination of minerals in the water and iron bacteria. Even after cleaning, stains will resurface if the water is not filtered or treated with a water-softening system.

How to Remove a Rust Stain from a Toilet Bowl
If you discover rust in your toilet bowl, you will need the following:

Tools/Equipment
  • Microfiber cloth
  • Old toothbrush
  • Spray bottle
  • Toilet bowl brush
  • Scrub brush
Materials
  • Salt
  • Lemon juice
  • Cream of tartar
  • Baking soda
  • Plastic food wrap
  • Cleaning vinegar
  • Pumice stick or powder
  • Distilled white vinegar
  • Commercial rust remover

Instructions
Use Citric AcidCitric acid may be used to effectively remove rust stains from toilet bowls. It may be made from fresh grapefruits, limes, lemons, or powdered citric acid purchased at medicine or supermarket shops. Dip the edge of fresh citrus fruit in baking soda or salt to offer a soft abrasive for washing rust spots. Use baking soda and lemon juice paste in areas with thick stains. Cover the paste with plastic wrap to keep it wet, and let it aside or longer to aid in the breakdown of rust particles. If you're using citric acid powder, prepare a mixture of a paste and a few drops of water and apply it straight to the discolored area. Remove the discoloration with elbow grease and an old toothbrush or scrub brush.

Distilled White VinegarDistilled white vinegar is another excellent toilet bowl rust remover. It includes acetic acid, which may help prevent rust stains from becoming permanent if applied every week. Cleaning vinegar, rather than food-grade vinegar, has a more excellent acidity that is more effective for tough rust stains. Scrub the colors with a toilet brush after adding one or two cups of vinegar to the toilet bowl. For older stains, drain the toilet bowl and pour in undiluted vinegar, letting it soak overnight (or at least two hours). Scrub it well and rinse it with clean water.

Cream of TartarCream of tartar, a powdered version of tartaric acid often used in baked products, is an excellent rust remover. Apply a paste with a few drops of water to toilet bowl stains. Let it take some time to work, then cover the area with plastic wrap to keep the paste wet.

Add Gentle AbrasivesMild abrasives such as table salt, pumice powder, or baking soda may be used with acid cleansers or alone. They are soft enough not to harm the porcelain finishes of toilets. To get the greatest results, use cleaner or water to moisten the stained surface and keep the area wet while applying the abrasive. Pumice is a naturally occurring volcanic rock that may be found in powder or solid form. Limescale, hard water, and rust stains may be removed using pumice stones or sticks.

Use Commercial Rust RemoversOn the market, several commercial rust removers efficiently remove stains. While some are harsher than others, take the time to read the labels thoroughly, follow the advice, and store and dispose of goods properly.

How to Clean a Toilet Tank of Rust
You'll need the following items to remove rust spots from the toilet tank:

Tools/Equipment
  • Sponge
  • Long handle scrub brush
  • Rubber gloves (optional)

Materials
  • Disinfectant cleaner
  • Distilled white vinegar

Instructions
Find the Water Valve
First, you must empty the water tank. If you need to halt the water flow, look for the control valve on the wall behind the tank or at the toilet's base. To stop the flow of water, turn it counterclockwise.

Empty the TankRemove the tank cover and place it someplace out of the way. Flush the toilet many times until the tank is empty. Depending on the reservoir size, you may need to flush it twice or thrice.

Assess the TankIf you have a fresh tank or reside in a water-rich location, you may need to scrub the tank well with a disinfecting cleaner. If there is rusty staining on the tank's bottom or a hard ring of minerals towards the top, you must thoroughly clean the tank with vinegar.

Use a Disinfectant CleanerSpray a disinfecting cleanser inside the tank's walls and floor and let it for 10 minutes or longer before cleaning it away. Wash away any filth using a long-handled scrub brush, delving into the tank's bottom and corners. Finally, using a moistened sponge and disinfecting cleaner, clean the "functioning components" of the toilet. Wipe down the flapper, handlebar or handle chain, ball float, and refill tube components. Spray cleaner on the sponge to avoid using too much cleaning and rusting metal components. Reopen the water valve and allow the tank to refill. Then, flush several times to remove the dislodged dirt and cleaner.

Utilize Distilled White VinegarRemove the top of the tank and fill it with distilled white vinegar until it reaches the level of the overflow valve. It might take up to three gallons of vinegar, depending on the side of the tank. Let it rest for 12 hours before flushing the vinegar away to empty the tank. Afterward, proceed in the same manner as with the disinfecting cleaner.

Do you need a plumber in Elizabeth, NJ? Elizabeth Plumbing and Drain Service is the answer. Please let us know if you're interested in our services. Get in touch with us at (908) 304-9983.

​
0 Comments

5 Plumbing Problems Costing You Money

3/7/2023

0 Comments

 
The myth that an ostrich conceals its head in the sand to avoid danger is false. However, it is not a myth that many New Jersey homeowners would ignore plumbing problems believing they will disappear.

It's more complex than Drip, Drip, Drip.
As problems seldom disappear, this thinking style could be an expensive mistake. They often develop into more severe plumbing issues that require more money. Our plumbers at Elizabeth Plumbing and Drain service advise addressing problems as soon as they appear to avoid spending more money in the long run.

These 5 Common Plumbing Issues Will Cost You MoneyHere are the top five most frequent plumbing concerns, according to our experts:

1. Leaky faucet
Our plumbers' most common daily issue is a leaking faucet, equivalent to flushing money down the toilet. You may pay a 10% increase in water expenses due to wasted water.
Do you still have reservations? A leaky faucet may waste up to 10,000 gallons of water each year, according to the US Environmental Protection Agency (EPA). This results in around 270 loads of laundry. The good news is that a leak can be fixed faucet is often simple.

2. Running toilet
A running toilet may waste hundreds of gallons of water each year, increasing your water bill. Depending on the toilet's constant running source, this problem may be simple.
Sometimes the solution is as easy as straightening up the flapper chain in the tank or fixing the crookedly positioned flapper on the drain. Both of these issues cause frequent water leaks, preventing the tank from ever becoming filled. It could be enough to replace the flapper valve, float, or fill tube.

3. Wrong-sized sump pump
Making sure your sump pump is the right size for your property is more crucial than you think. If your pump is too tiny, it may get overworked and need a continual operation to keep up with the water flow in your Elizabeth house. This might result in pump burnout or increased energy costs.
Alternatively, the pump may be unable to keep up, causing the basement to flood. The use of an appropriate-sized sump pump avoids and overcomes these issues. If you suspect your pump is the wrong size for your property, please contact one of our Elizabeth Plumbing and Drain services. Our plumbers are all very talented and educated.

4. Water heater is making noises
If your water heater starts making loud banging sounds, don't expect them to disappear. The most typical cause is silt buildup in the tank's bottom. When the hot water is turned on, the sediment circulates, causing air bubbles to form. Between the bubbles and the residue, there may be hammering noises.
Ignoring this issue costs money since it reduces the life of your tank. So, as soon as you hear the noises, call one of our experienced plumbers. To avoid this in the first place, have your tank drained and sanitized once a year. For more information.

5. Dripping sounds in walls or ceiling
If there is a water leak in your Elizabeth home's subsurface plumbing, the walls or ceiling may begin to drip. This might result in mold growth and expensive repairs such as repairing drywall, plaster, or deteriorating wood. You've undoubtedly seen the gradual erosion of rocks caused by even small amounts of water. Simply said, the materials in your house are far more prone to wear and tear.
If you hear leaks, please contact one of our plumbers right once. If you overlook drips, you will wind up paying more money in the long run. It is best to learn as soon as possible rather than later.

Elizabeth Plumbing and Drain Service is here to help you with your plumbing needs.
These are a few more frequent plumbing issues that our Elizabeth Plumbing and Drain service handles daily in Elizabeth, New Jersey, homes. If you detect any of these plumbing problems in your house, contact us at (908) 988-0365 or request assistance online to save money in the long term. We are here to assist
0 Comments

5 Signs You Need Sump Pump Repair

2/28/2023

0 Comments

 
Your sump pump prevents floods in your basement. However, if it is broken, it cannot execute its role correctly.
Recognizing sump pump problems helps you to take action as soon as feasible. Elizabeth Plumbing and Drain service professionals are here to help you with your plumbing needs. Contact us if you have a problem with your New Jersey property's sump pump, drain line, or water heater.
However, how can you identify when a sump pump problem has to be addressed? Here are several signs that you should call our professionals to perform a review:

You Hear Your Sump Pump Making Unusual Sounds
Please call us if your sump pump is creating an unusual noise. A warning indication of a problem should not be ignored since ignoring it might cause the issue to worsen.
Elizabeth Plumbing and Drain service specializes in sump pumps. We can quickly establish the reason for your sump pump's failure and do the necessary repairs when needed.

Your Sump Pump Runs Inconsistently
Is your sump pump constantly on? Or does your sump pump cycle on and off during the day? The float switch or another critical component has failed.

You Notice Rust On Your Sump Pump
Although it is unusual, a corroded sump pump is never good. The constant interaction of your sump pump with water may cause corrosion and even bacteria growth. Rust and bacteria may build up in your sump pump, producing water flow and drainage concerns that may need repair.
Routine maintenance services may aid in the prevention of rust and the growth of microorganisms. Our Elizabeth Plumbing and Drain service professionals can test your sump pump to ensure it is completely clean and operating.

Water Continues to Build Up in Your Basement
Sump pumps are often overlooked in homes, which may be costly if they fail when they are most needed.
According to the First Street Foundation, over 142 million residences in the United States are in danger of flooding. Regular maintenance will ensure that your sump pump can assist in avoiding floods and their harmful consequences.
Regular sump pump maintenance ensures that your system operates efficiently and safely. It is feasible to avoid expensive repairs by detecting and repairing issues as soon as they arise.

Your sump pump has reached the end of its useful life.
Service pumps that are properly maintained may last up to 10 years; if your sump pump is nearing or beyond this barrier, you will most likely begin to have problems.
When your sump pump reaches this age, it is frequently advisable to replace it rather than repair it. Otherwise, you will have to pay to repair your sump pump and replace it. Click here.
We install, replace, repair, and maintain sump pumps for a safe and healthy home. Elizabeth Plumbing and Drain service can assist you with any plumbing issues you may be experiencing.
Call Elizabeth Plumbing and Drain Service for Sump Pump Repair or Replacement.Make sure to leave your sump pump in good shape at your Elizabeth, NJ, home. Contact Elizabeth Plumbing and Drain Service to resolve problems and ensure your equipment is operating correctly. Now is the time to call (908) 988-0365 or file an online service request.
0 Comments

How Often Do I Need to Clean My Main Sewer Line?

2/21/2023

0 Comments

 
How often do you consider your Elizabeth home's sewage pipes? You're not alone if you don't think twice about your main sewage line.
Elizabeth Plumbing and Drain service value your plumbing needs and concerns. We want to assist you in properly maintaining your main sewage line since it is critical to the plumbing in your whole New Jersey house. For more information.

A sewage line cleaning should be planned ideally every one to two years, but your main sewer line should be cleaned as needed. Your health and safety are vital.
You should have your sewage lines examined and cleaned more often if:
  • Your home is rather ancient.
  • You've never lived in a house before.
  • You often deal with plumbing problems such as backed-up sewage and blocked drains.
Elizabeth Plumbing and Drain service can handle any of your plumbing needs. We provide repiping, toilet and faucet repair, central line sewer cleaning, and more!
Our experts are ready to help you build a safer and healthier home by providing excellent heating, cooling, and plumbing solutions.

What Are the Benefits of a Main Line Sewer Cleaning?The following are the main justifications for hiring a qualified sewage line cleaner:
  • maintains the health of your sewage line
  • improves the condition of your home's plumbing system
  • boosts water flow aids
  • in drainage

Your primary sewage line must be maintained clean. Clogged drains, sinks, and toilets might be signs of a much larger issue. Maintain a clean and clear plumbing system throughout your house for maximum efficiency.

Consider high-efficiency plumbing fittings for even more efficiency. The US Environmental 

Protection Agency says (EPA), high-efficiency toilets perform better than standard versions and consume less water every flush than 1.3 gallons. Even the most effective plumbing fixtures may only succeed if they are properly maintained or if there is a problem with your main sewage line.
Continue to do these periodic cleanings to get the benefits of a healthy home plumbing system.

How Is a Main Line Sewer Cleaning Performed?Our experts may begin with a camera examination, which entails using a waterproof camera to collect your underground plumbing video footage. We will utilize a wire to transfer the video camera underneath and examine the general health of your system. This helps us to assess if any concerns need to be addressed.

Hydro-jetting is a fantastic option when it comes time to clean your main sewage line! Our specialists may use high-pressure jetting to properly clear out your sewage system, assisting in unclogging and reducing dirt and debris accumulation.
Hydro-jetting is a cost-effective and efficient way of cleaning your sewage line that promotes the appropriate functioning of the whole plumbing system within your house.

Signs Your Main Sewer Line Cleaning Is Overdue
Can you remind me of the last time your sewage lines were professionally cleaned? Here are a few indicators that it's time to schedule your mainline sewer cleaning (and that you've been putting it off for far too long!):
  • Your drains have a strong odor.
  • Slowly moving drains around the home, gurgling sounds from plumbing connections or pipes
  • Mildew or mold development on
  • around plumbing fixtures
  • clogged toilets
  • sewage spill
Missing a maintenance visit for your plumbing system may cause minor problems to worsen, so the best course of action is to schedule service as soon as you remember.
Please call us immediately if you discover a problem with your sewage line, drain line, pipes, or plumbing fittings.

Sign up for our maintenance plan to guarantee you never miss another vital maintenance visit. This is a terrific way to remain on top of routine maintenance duties, and our specialists can recommend the correct services to keep your whole home's plumbing system in good condition. You will also benefit from speedier service and savings on your plumbing bills.

Call Our Sewer Line Cleaning and Plumbing ProfessionalsElizabeth Plumbing and Drain Service will help you whether you need your Elizabeth, NJ, home's main line sewer cleaned or another critical plumbing service. Allow us to serve as your one-stop shop for your plumbing, heating, and conditioning needs. Call us at (908) 988-0365 or submit an online assistance request today.
0 Comments

How To Prevent Home Radiators From Leaking Or Rusting

12/30/2022

0 Comments

 
If you're a homeowner, it may appear that everything around the house requires maintenance.

While this is generally true, we occasionally wait for things to fail before undertaking necessary maintenance.


Take, for example, home radiators. Consider this. When was the last time you had it serviced for preventive maintenance?

We thought it would be a good idea to put together suggestions on how to prevent and fix the common causes of radiator leaks after suffering from what seemed like an endless winter.

What Causes Radiator Leaks in the Home?

We decided to start here because most owners are unaware that even the most basic chemical reaction can create rust and leaks in your heating unit. Typically caused by untreated sludge in home radiators—if left untreated, it can form microscopic holes in your unit, causing leaks.

Water and steel will always react. So, unless you're seeking to replace your home radiator, inspect it and remove any mud-textured stuff that could cause the radiator to cease working properly.

How Can I Avoid Rusting?

If your system is still under warranty, make sure the plumber washed away any debris before installing your unit. Any garbage that recycles itself through your system increases the likelihood of corrosion.

However, if your system is free of dirt, we recommend using a corrosion inhibitor. Because this offers an extra layer of protection to your unit, it slows the corrosion process and increases its longevity.

What if my unit has already begun to leak?

Simply because your radiator is leaking does not necessitate buying a new unit. Radiator leakage, contrary to popular assumption, does not necessarily result in exorbitant out-of-pocket expenses.

If you have a dripping radiator, follow these steps:

1. Determine the source of the water. Dry out the radiator completely and determine the cause of the leak.

2. If the leak is originating from one of the valves, you should contact a plumber. Take a wrench and completely close the radiator valve. This should stop the leak when your plumber arrives at your house.


3. A leak can occur at the junction of a pipe and one of the valves. Tighten the loose bolts yourself before making a house call. This could be the solution to your problem.

4. However, if your leak is originating from your electric radiator, this indicates that your radiator needs to be changed right away.

Replacing your radiator is never fun, and the costs may add up quickly. So, if you haven't completed a basic system maintenance check, we strongly advise you to do so before it's too late. Don't wait until your home radiator breaks to perform routine maintenance.

We are the most comprehensive online retailer of radiators and heating equipment

Are you looking to purchase a radiator? Take a look at our buyer's guide!
0 Comments

How To Bleed Your Central Heating Radiators

12/22/2022

0 Comments

 
Air will accumulate within your central heating circuit over time. As a result, cold spots occur and the panels become less efficient at dissipating heat. As a result, one of the simplest things you can do to increase operational efficiency and make your home more comfortable is to flush radiators throughout your home.

This straightforward procedure is best described in the video below, hosted by Craig Phillips. Do you remember him? Big Brother 1's all-around wonderful egg? Anyway, it's only around 3 minutes long, so give it a look; there are also some simple instructions underneath.

Radiator Bleeding Procedure

What you'll require:

  • A flathead screwdriver 
  • or a radiator key
  • rags/sponges

Step 1
First, turn on the heat and warm up the radiators throughout your home. This will increase the pressure in the radiators.

Step 2 
Go around each radiator and make a note of the ones that have cold spots, which are usually near the top of the panel. Here is where the air has gathered.

Step 3 
Turn off the heat and, once the radiators have cooled slightly, begin the bleeding procedure. Some valves have a slot in them that will accept a flathead screwdriver if you don't have a bleed key.

To evacuate the surplus air, use the radiator bleed key, preferably a brass one. Turn the square bleed screw or screwdriver anti-clockwise slowly. You can hear the air hissing as it escapes. Any droplets of water should be collected with rags or a sponge. When all of the air has been expelled, you will get a jet of water rather than a drip. Close and tighten the valve immediately.

Bleed radiators one at a time till finished.

Step 4 
Restart the central heating system and check for chilly spots once more. Repeat the procedure as needed.

Step 5 
If no air escapes despite this procedure, the pressure in the boiler may be too low to force the air out. To top up the pressure, follow the process, which is normally available on the front panel of the boiler.

Also, if the operation is effective, the boiler pressure may have dropped and may need to be replenished.

That's all there is to it.
0 Comments

Seasonal Radiator Maintenance Tips You Need To Know

12/14/2022

0 Comments

 
Though forced air heating is more somewhat commoon, most residents rely on radiant heating systems to heat their homes today.

They may seem old-fashioned to some, but radiators provide consistent and comfortable heating. Radiators keep interiors warm without the dry heat of warm air heating, and the systems last for a long time. Radiator maintenance is minimal, but it is important to make sure you do it properly to keep your system running efficiently.

Ready to learn how to care for your radiator system? Read on to find out which tasks you can complete yourself, and which are better suited to a professional.

How Radiators Function

Radiant heat is driven by hot water. A closed system consisting of a boiler and connecting pipes are filled with water, which is heated by the boiler to over 87 degrees Celsius. A pump pushes the hot water through the pipes and into strategically placed radiators, which heat the air around them.

Once the water cools down, it returns to the boiler. This closed system constantly recycles water by returning it to be heated again. This means you have an efficient system that uses minimal utilities.

One big benefit of radiant heat is that it is great for your home environment. While forced air systems may be more powerful, they also dry out the air around you and force dust and particulate around your home. Radiant heat can also be more consistent.

Older radiators are typically made of cast iron, which is very heavy and retains heat for a long period of time. Newer radiators are made out of lighter, more inexpensive materials such as steel.

Radiator Maintenance

Radiator systems are very easy to care for, requiring some basic seasonal maintenance to keep them running for years to come. Follow these steps in order to make sure your closed system is functioning efficiently:

Bleed the Radiator

Though a boiler and its connected pipes are a closed system, air can escape from within the water as time passes. The air, which is lighter than water, rises to the top of the radiators and creates air pockets. As part of your seasonal maintenance, it’s important to bleed this excess air out of the system.

The first step is to turn off the system and allow the water to cool. Alternatively, you could perform this maintenance shortly before the weather cools down, before you’ve turned it on for the first time.

Your radiators should have a small valve toward the top. They may have a special key or may be able to be turned by hand. Holding a bowl under the opening below the bleed, turn your valve counter-clockwise and listen for a hiss as air escapes.

When you turn the valve, the pressurized system will force air out. Leave the valve open until water comes out, then close it by turning the valve key counterclockwise. It’s normal for the water in the lines to look murky or dirty, so don’t be alarmed.

Check the Boiler Pressure

After the system is bled of air, you will next want to check the boiler pressure. Open the service panel on the boiler, and look for a temperature and pressure gauge. A cold boiler should read 1.3 bar, depending on the manufacturer, and a hot boiler should read 1.5-1.8 bar.

If your boiler falls under these pressure guidelines, you may need to add more water to the system. A cold water pipe that leads into your boiler can be opened in order to allow more water in, which you should do while closely watching the pressure gauge. Shut the cold water valve when your gauge hits 1.3 bar.

If you do accidentally bring the pressure above 1.3 bar, your system will have a pressure relief valve. Be aware that this valve will evacuate water to balance the system, and make sure you have a large bucket underneath it to catch any water that spills out. You can also use this valve to release water if your gauges are reading too high from the beginning.

​Combustion Chamber Maintenance

Your boiler is powered by a combustion chamber, which provides the fire to heat the water. If the chamber collects too much residue, it may not perform efficiently. Cleaning out the chamber is dangerous due to fire risk, so it is advised to have a professional service this element of your system every few years.

Stay Safe and Warm

With these tips, you’ll have a better idea of what radiator maintenance you can do each year to keep your system working efficiently. A properly maintained system can last for decades with little work.

Always use caution with your radiator system, ensuring the water is cooled and safe before attempting any of these maintenance tasks. Though radiators are very safe, any maintenance performed when the boiler is hot can result in severe burns from hot water or steam.

If you’re looking for high-quality and designer radiators, visit us at Elizabeth Drain Service today!
0 Comments
<<Previous

    Archives

    March 2023
    February 2023
    December 2022
    November 2022
    October 2022
    September 2022
    August 2022
    July 2022
    June 2022
    April 2022
    March 2022
    February 2022

    Categories

    All
    Bathroom
    Dishwasher
    Diy
    Drain
    Español
    Faucet
    Pipes
    Plunger
    Save Money
    Septic Tanks
    Tips & Advice
    Tips And Advice
    Toilet
    Water Heater

    RSS Feed

Elizabeth Plumbers and Drain Service
​VISIT US ON FACEBOOK 
Picture
162 Elmora Ave. #323
Elizabeth, NJ 07202


elizabethdrainservice@gmail.com
www.elizabethdrainservice.com

(908) 988-0365

Picture
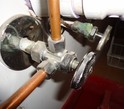
Standard copper under sink valve. We are plumbers, too!
Picture
Treat your plumbing like gold, and it will reward you for years to come!
Picture
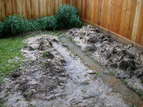
Backyard sewer line, excavated, replaced and filled.
TAP TO CALL US NOW!
Elizabeth Drain Service is a full service and licensed plumbing contractor that specializes in drain clearing and sewer backups and repairs.  Call us today if you have any plumbing needs.  
Elizabeth Drain Service Plumbers Logo
Powered by  SEO Digital Marketing of New Jersey

  • Plumbers / Drain Service
  • Plumbing Services
    • Boiler Repair - Replace
    • Clogged Drains and Sewer Lines
    • Faucet Replacement
    • Furnace Installation & Replacement
    • Furnace Service & Maintenance
    • General Plumbing Repairs
    • Heat Pump Service & Maintenance
    • Hot Water Heater Repair Replace
    • Humidity Control & Dehumidification
    • New Supply and Drain Lines
    • Toilet and Vanity Replacement
  • About Us
  • Privacy Policy
  • Contact Us
  • Areas We Service
    • Plumber Bayonne
    • Plumber Belleville
    • Plumber Carlstadt
    • Plumber Edgewater
    • Plumber Hoboken
    • Plumber Jersey City
    • Plumber Kearny
    • Plumber Lodi
    • Plumber Lyndhurst
    • Plumber Newark
    • Plumber North Arlington
    • Plumber North Bergen
    • Plumber Palisades Park
    • Plumber Ridgefield Park ​
    • Plumber Rutherford
    • Plumber Secaucus
    • Plumber Teaneck
    • Plumber Union City
    • Plumber West New York
    • Plumber Weehawken
  • Blog